The hours of shifts offered and refused by an employee can be recorded and accounted for when filling shift deficiencies in required staffing.
In this article:
1) Entering Refusal Hours in a Specific Shift
2) Verifying and Adjusting Refusal Hours
3) Reporting Refusal Hours
Entering Refusal Hours in a Specific Shift
- From the Published or Unpublished schedule, navigate to the Employee List
- Find the employee and shift to add refusal hours to.
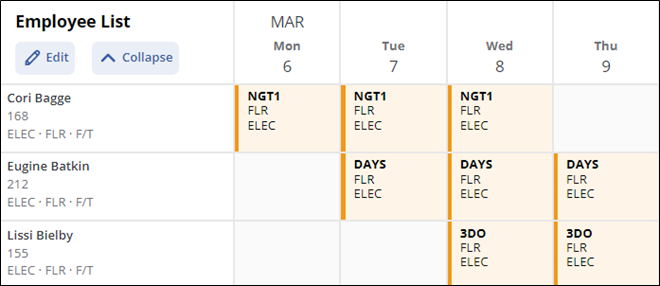
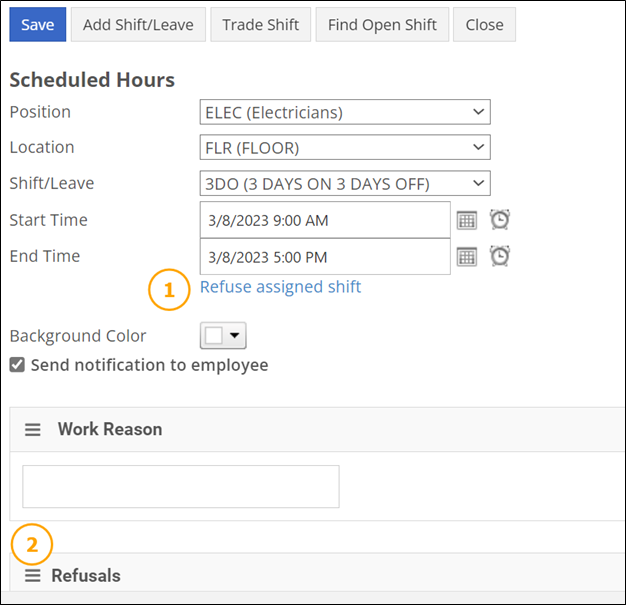
- Once the Edit Shift window is open, there are two ways to add refusal hours to this particular shift:
- Click the Refuse assigned shift link and update the Add Refusal window.
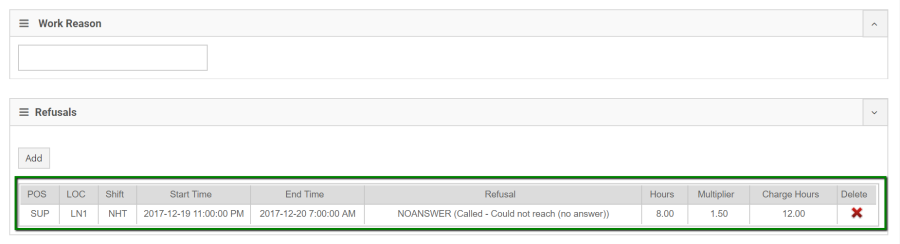
- Expand the Refusals section, click Add, and update the Add Refusal window.
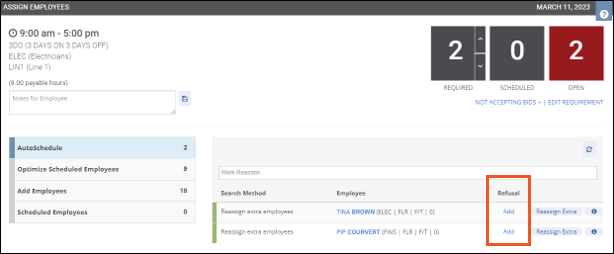
- Refusal hours can also be added by selecting a cell in the Coverage Summary. From the Candidate Finder (ASSIGN EMPLOYEES), click Add under the Refusal column.
- The date when the employee refused the shift will show in the Called on field.
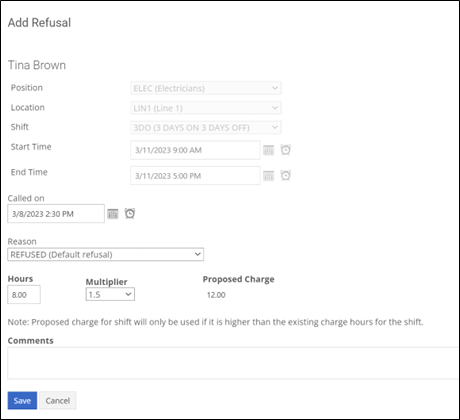
- Add the Hours and the Multiplier you want to apply for the refusal.
- Add Comments to this charge, then click Save.

- The refusal will be displayed in the Refusals section of the Edit Shift window.
Verifying and Adjusting Refusal Hours
- From Home > Manage Overtime > Manage Employee Overtime, you can see how many total refusal hours an employee has up to (and not including) the Overtime Up to Date.
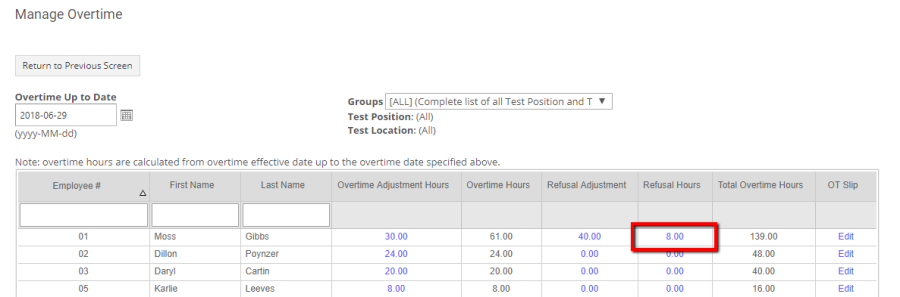
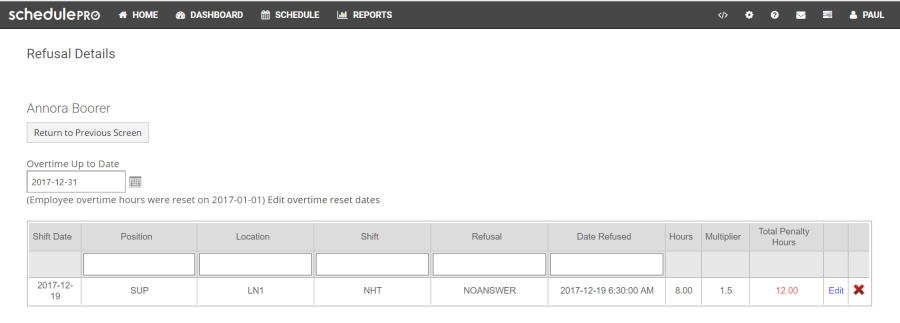
- Click the Refusal hours link to view all the refusal transactions for that employee since the last Overtime reset date (and up to the selected Overtime Up to Date.)
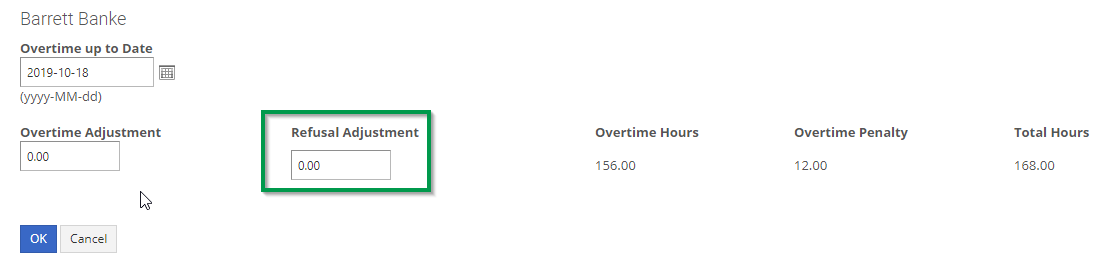
- If the refusal hours do not match your records and you need to make adjustments, you can do that by clicking the Refusal Adjustment link, then New Adjustment on the next screen.

- Enter the Refusal adjustment amount. You can enter positive or negative numbers.
The refusal adjustment will be applied on the date you choose when entering the adjustment. The adjustments need to reflect the total amount that needs to be adjusted, not the increment from the last adjustment.
For example, if the total refusal hours through March 1 should be 12.5 but the field displays only 12, you will need to make an adjustment of 0.5 with a date of March 1.

-
- Add 0.50 in the Refusal Adjustment field with a date of March 1 and click OK.
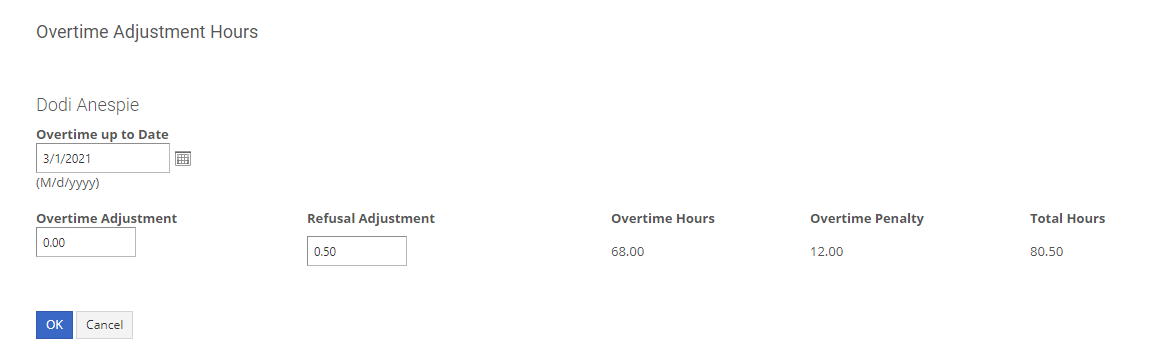
- The Refusal Adjustment hours now display 0.05, and the Refusal Hours 12.00. The Total Overtime Hours was also updated, but the adjustment will not change the Refusal Hours column.

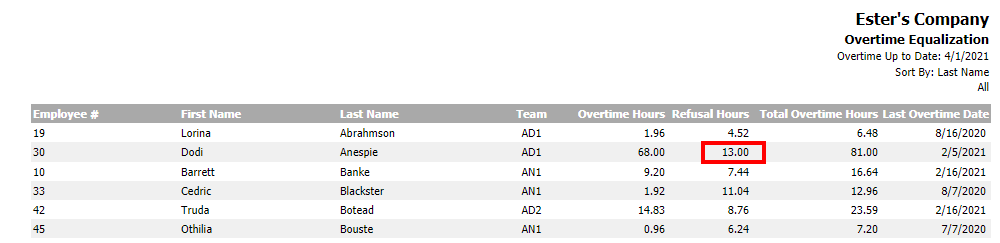
- If you want to see the Total Refusal Hours up to a certain date, you will need to run the Overtime Equalization report.
- Add 0.50 in the Refusal Adjustment field with a date of March 1 and click OK.
Reporting Refusal Hours
There are 2 different reports that you can run to display refusal hours for an employee or a group of employees listed below:
- Refusals Report
- Overtime Equalization Report
Refusals Report
- Go to Reports > All Reports > Off Work Stats > Refusals

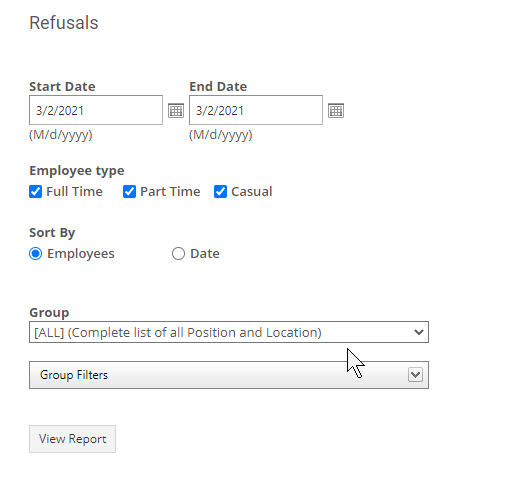
- Choose the Start Date, End Date, Sort By (Employee or Date), and a Group if applicable.
- Group Filters: You can also select a specific position/location combination.
- This report will include the following columns.

Overtime Equalization Report
- Go to Reports > All Reports > Off Work Stats > Overtime Equalization

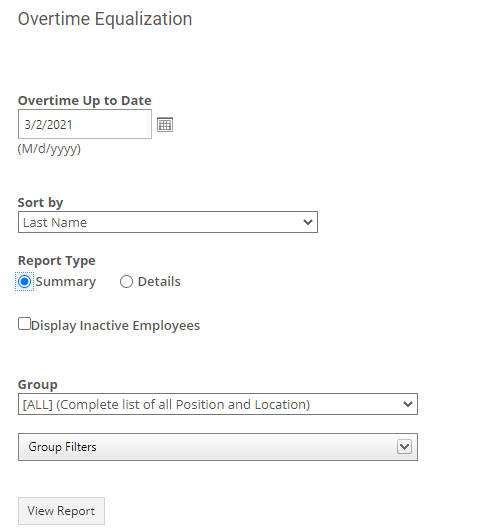
- If you choose the Summary option, it will only give you information about the total refusal hours for each employee up to the selected date.

- If you choose the Details option, it will divide the total refusal hours between refusals and adjustments.
