In SchedulePro, you can be assigned to a group. This assignment is made by a system administrator or scheduler. If you have been assigned to a group, you may be given permission to view the schedule for your whole group.
Viewing Your Group’s Schedule
Once you’re signed in to SchedulePro, you can access your group’s schedule by clicking View Group’s Schedule on the homepage or in the SCHEDULE dropdown on the navigation bar.

You’ll see your group’s schedule displayed in calendar format. Each row in the calendar is the name of one of the employees in your group. The dates are displayed along the top.
Filters are primarily in the left hand panel, but there are view options available across the top. These filters remain with you as you scroll down the page.
Filters (Left Panel)
- Groups: by default, you're taken to the group you have visibility to
- Area / Location: where people work
- Position: what people are doing
- Shift: code for the shift duration
- Leave: filter by leave codes
- Employees: search for individuals you are looking for (multi-select)
- Teams: if your organization is using teams, you can multi-select different teams to view (may be called something else)
- View by Manager: search for employees who report to a specific person
- Page Size: minimize or expand the number of people showing
- Hide (0/0) rows: if you can see the requirement summary at the top, you can choose to hide blank lines by enabling this
Once you have your filters set, hit apply to update your view. If you do not need the filter, click on the X to hide it from view.
Schedule View Filters
You can choose to view your group schedule in different ways.
- Start Date: the first day to display on the schedule
- Duration: the number of days to see in the schedule
- View Type: schedule is the default and likely will work best, but you can choose hourly or assignments (secondaries and certifications are primarily used by the scheduling team)
- Sort By: determines how the list of employees is sorted (Seniority, Employee Name, Employee Position, Employee Location, or Employee Team)
- Summary: if you have the ability to see requirements, you can show the requirements at the top of the page, bottom of the page, or hide them altogether
-
Legend: in the upper right hand corner, there's a legend to show you what each icon on the shifts stands for
Each cell in the calendar contains the shift(s) the employee in that row is scheduled to work that day. You can click any cell and a pop-up will appear showing all the details of the shift scheduled day.
Viewing or Downloading the Group Schedule Report
- If you want to view or download a printable version of your group’s schedule, navigate to Reports > Group Schedule.
- Update the filters.
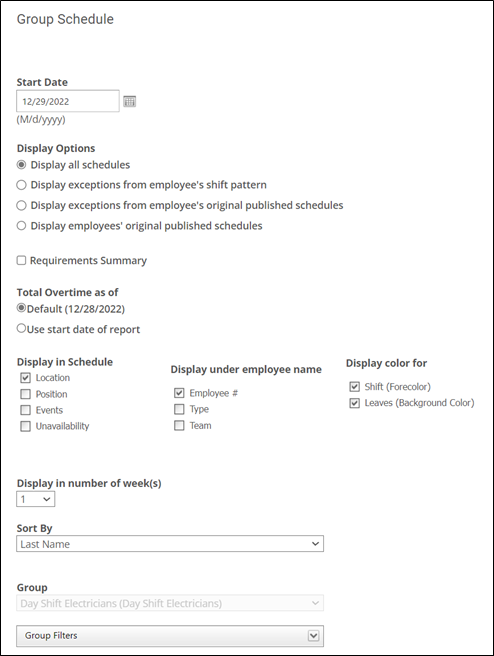
- Start Date: The date on which you want the schedule to start.
- Display in number of week(s): You can choose to display 1 week, 2 weeks, or 3 weeks.
- Display in month: If you want to just display the schedule for a whole month, choose this option.
- Sort by: Determines how you want the list of employees in your group to be sorted.
- Display in Schedule: This determines whether or not you want information about your coworkers’ locations, positions, hours paid, and events to be displayed in the report.
- Display under employee name: This determines whether or not you want information about your coworkers’ primary positions, types (full-time/part-time/casual), and teams to be displayed underneath their names on the report.
- Display color for: When system admins set up shifts and leaves, they have the option of assigning each one its own background color. Here, you can determine whether or not you want those background colors to appear on the group schedule report (not recommended for people without color printers).
- Group – As an employee, you won’t be able to change this option.
- Group Filters: If you only want to display information about coworkers with certain positions/locations, expand this section to choose from a list of positions and locations in your group.
- Click View Report.
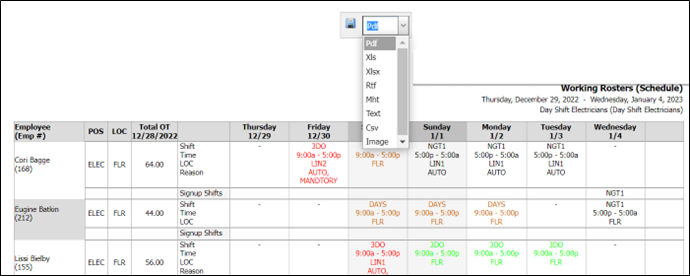
- At the top of the page is the download menu. Choose the format you want to utilize. Then click the save icon and the report will be downloaded to your computer.